<script type="text/javascript">
function isMobile(){
	var UserAgent = navigator.userAgent;

	if (UserAgent.match(/iPhone|iPod|Android|Windows CE|BlackBerry|Symbian|Windows Phone|webOS|Opera Mini|Opera Mobi|POLARIS|IEMobile|lgtelecom|nokia|SonyEricsson/i) != null || UserAgent.match(/LG|SAMSUNG|Samsung/) != null){
		return true;
	}else{
		return false;
	}
}

if(isMobile()){
	location.href = "https://MOBILE_URL";	//모바일페이지
}else{
	location.href = "https://PC_URL";	//PC페이지
}
//홈페이지 개발시 접속 경로를 알아 오려했을 때 모바일과의 분류 방법 
//페이지 로드시에 함수가 실행되어서 로드됨과 동시에 모바일은 모바일 페이지로 처리

</script>


[중요팁]


- xml, json : 서버가 클라이언트에게 데이터를 전달할 때 표현하는 방법

xml : 태그로 구분해서 데이터를 표현, 사람이 보기 쉽지만, json보다 용량 크고 웹에서 파싱과정이 복잡

json:java script객체를 표현하는 방법을 사용, 사람이 보기는 어렵지만, 용량이 xml보다 작고 웹에서 파싱이 수월

예> 서버가 보내는 메세지는 xml 또는 json으로 /  카카오톡 푸쉬, 광고 이미지 출력


json 문법


[      ]                배열

{      }                객체

:                           속성(멤버변수)과 값의 구분

,                           객체와 객체 / 속성과 속성 구분


[제이손 ajax로 파싱해서 가져오기, 소스파일]


<html>
 <head>
  <meta charset="UTF-8"/>
  <title>JSON 파싱</title>
 
  <style> </style>
  
  <script src="//code.jquery.com/jquery-1.11.3.min.js"></script>
  
  <script>
  
  //$(function(){})의 기능은 body의 구조를 파악하자 마자
     $(function(){
    $.ajax({
     url: "data.json",
     dataType: "json",
     success: function(data){
      //json의 경우는 data는 파싱된 결과
      //alert(data[0].num);
      $.each(data, function(index, item){
       alert(item.key + ":" +item.value);
       
       //객체를 가져다가 파싱
       //var ar=data["fields"];
       //var ar1=data["records"];
       //alert(ar[0].id+ar1[0].재산구분)
      })
      
     }
    })
   })
  </script>
  
  
   </head>
 <body>
  
 </body>
 
</html>


[json파일 만들기  "data.json"]


​[{"key":"1", "value" : "국어"},
{"key":"2", "value" : "수학"}]


출처 : http://blog.naver.com/vanillasea81/220385546099


	var screenWidth = screen.width;
	var popNum =0; //팝업 번호
	var popQuantity =4; //팝업 총 량
	
	var popLeft =5; //팝업 left 초기 셋팅
	var popInterval = 420; //팝업 left 간격
	var popTotalWidth = popQuantity * popInterval +popLeft ; //팝업 총 수량 * 팝업  left 간격  + 팝업 초기값
	var popMinusLeft=0; //빼야 할 레프트값 변수 선언
	
	if(screenWidth <= popTotalWidth ){ //해상도가 팝업 총 left 보다 작거나 같을 경우
		popMinusLeft = (popTotalWidth-screenWidth) /(popQuantity-1);  //(해상도 - 총 left 값) / (팝업 총 수량 -1)
	}

	if ( getCookie('open2') != 'done' ) {
		popNum++;
		noticeWindow1  =  window.open('../popup/popup_140113.html','open2','width=400,height=470,top=5,left=5');

		noticeWindow1.opener = self;    
	} 
	if ( getCookie('open1') != 'done' ){ 
		popLeft = popLeft + popInterval - popMinusLeft; //팝업 left 좌표 = 기존 left + 팝업 left 간격(크기) - 빼야할 값
		popNum++;
		//noticeWindow1  =  window.open('../popup/popup_131211.html','open1','width=400,height=470,top=5,left=425');  
		noticeWindow1  =  eval("window.open('../popup/popup_131211.html','open1','width=400,height=470,top=5,left="+popLeft+"');")
		noticeWindow1.opener = self;    
	}
	if ( getCookie('open4') != 'done' ){ 
		popLeft = popLeft + popInterval -popMinusLeft;
		popNum++;
		//var noticeWindow3  =  window.open('../popup/popup_140303.html','open4','width=400,height=470,top=5, left=845');
		var noticeWindow3 =eval("window.open('../popup/popup_140303.html','open4','width=400,height=470,top=5, left="+popLeft+"');");
		noticeWindow3.opener = self;    
	}
        //팝업 순서에 맞게 각각 left 값이 (-) 되어 적용된다.
       //현재 팝업 총량, 팝업 left 간격(width+@), 첫 팝업의 left 는 수동으로 해야 한다.
       //DB를 읽어와서 하는 형태가 아니므로 한계가 있는 것 같다. 더 보완 하도록!

/****************************************************
base64.js
---------
A JavaScript library for base64 encoding and decoding
by Danny Goodman (http://www.dannyg.com).

Described in "JavaScript and DHTML Cookbook" published by
O'Reilly & Associates. Copyright 2003.

[Inspired by many examples in many programming languages,
but predominantly by Java routines seen in online
course notes by Hamish Taylor at
   http://www.cee.hw.ac.uk/courses/2nq3/4/
The binary data manipulations were very helpful.]

This library is self-initializing when included in an
HTML page and loaded in a JavaScript-enabled browser.
Browser compatibility has been tested back to Netscape 4
and Internet Explorer 5 (Windows and Mac).

Two "public" functions accept one string argument
(the string to convert) and return a string (the converted
output). Because this library is designed only for
client-side encoding and decoding (i.e., no encoded
data is intended for transmission to a server), the
encoding routines here ignore the 76-character line limit
for MIME transmission. See details of encoding scheme
in RFC2045:

http://www.ietf.org/rfc/rfc2045.txt

These routines are being used to encode/decode html
element attribute values, which may not contain an
equals (=) symbol. Thus, we do not allow padding of
uneven block lengths.


To encode a string, invoke:

 var encodedString = base64Encode("stringToEncode");

To decode a string, invoke:

 var plainString = base64Decode("encodedString");

Release History
---------------
v.1.00    07Apr2003    First release

****************************************************/

var enc64List, dec64List;


function initBase64() {
    enc64List = new Array();
    dec64List = new Array();
    var i;
    for (i = 0; i < 26; i++) {
        enc64List[enc64List.length] = String.fromCharCode(65 + i);
    }
    for (i = 0; i < 26; i++) {
        enc64List[enc64List.length] = String.fromCharCode(97 + i);
    }
    for (i = 0; i < 10; i++) {
        enc64List[enc64List.length] = String.fromCharCode(48 + i);
    }
    enc64List[enc64List.length] = "+";
    enc64List[enc64List.length] = "/";
    for (i = 0; i < 128; i++) {
        dec64List[dec64List.length] = -1;
    }
    for (i = 0; i < 64; i++) {
        dec64List[enc64List[i].charCodeAt(0)] = i;
    }
}

function base64Encode(str) {
    var c, d, e, end = 0;
    var u, v, w, x;
    var ptr = -1;
    var input = str.split("");
    var output = "";
    while(end == 0) {
        c = (typeof input[++ptr] != "undefined") ? input[ptr].charCodeAt(0) :
            ((end = 1) ? 0 : 0);
        d = (typeof input[++ptr] != "undefined") ? input[ptr].charCodeAt(0) :
            ((end += 1) ? 0 : 0);
        e = (typeof input[++ptr] != "undefined") ? input[ptr].charCodeAt(0) :
            ((end += 1) ? 0 : 0);
        u = enc64List[c >> 2];
        v = enc64List[(0x00000003 & c) << 4 | d >> 4];
        w = enc64List[(0x0000000F & d) << 2 | e >> 6];
        x = enc64List[e & 0x0000003F];
        if (end >= 1) {x = "=";}
        if (end == 2) {w = "=";}
        if (end < 3) {output += u + v + w + x;}
    }
    var formattedOutput = "";
    var lineLength = 76;
    while (output.length > lineLength) {
     formattedOutput += output.substring(0, lineLength) + "\n";
     output = output.substring(lineLength);
    }
    formattedOutput += output;
    return formattedOutput;
}

function base64Decode(str) {
    var c=0, d=0, e=0, f=0, i=0, n=0;
    var input = str.split(""); //""로 잘라서 input 배열 생성
    var output = "";
    var ptr = 0;
    do {
        f = input[ptr++].charCodeAt(0); //배열의 인덱스 값을 증가시키며 첫번째 문자의 unicode 값을 f로 받는다
        i = dec64List[f];
        if ( f >= 0 && f < 128 && i != -1 ) {
            if ( n % 4 == 0 ) {
                c = i << 2;
            } else if ( n % 4 == 1 ) {
                c = c | ( i >> 4 );
                d = ( i & 0x0000000F ) << 4;
            } else if ( n % 4 == 2 ) {
                d = d | ( i >> 2 );
                e = ( i & 0x00000003 ) << 6;
            } else {
                e = e | i;
            }
            n++;
            if ( n % 4 == 0 ) {
                output += String.fromCharCode(c) + String.fromCharCode(d) + String.fromCharCode(e);
            }
        }
    }
    while (typeof input[ptr] != "undefined");
    output += (n % 4 == 3) ? String.fromCharCode(c) + String.fromCharCode(d) : ((n % 4 == 2) ? String.fromCharCode(c) : "");
    return output;
}
initBase64();
주석다신분이 원작자. 출처는 까묵었음

구글맵을 파라미터로 띄워주고 싶었으나

 웹접근성에 걸리므로 구글맵스로 링크로 대체 하였다

 그때 넘기는 파라미터에 따라 나타내줄수 있는것들 많이 있어 일부 정리함


http://maps.google.co.kr/maps?

--General--

&q=(카테고리)  

&near=(주소)   

&g=(내 위치정보 저장 관련인듯) 


-- Search Mode --

&mrt= (검색옵션 보기 )

       =all (모든 검색결과)

       =loc (위치정보)

       =yp(업체)

       =websearch(??)

       =realestae(부동산??)

       =ds(사용자 제작 콘텐츠??)


--  Location --

&ll=(??)

&sll=(??)

&spn=(??)

&latlng=(??)

&cid=(??)

&geocode=(??)

&radious=(왼쪽패널에 표시되는 검색범위)


-- Map Display --

&t= (맵 종류)

    =m(지도)

    =k(위성)

    =h(혼합)

    =p(지형)

    =e(구글어스) 

&z= (줌 레벨 설정(범위1-20)) 

&layer= (건물사진 위키피아 등등 )

&lci=com.panoramio.all Photos (from Panoromio) 

      =com.youtube.all Videos (from YouTube)

      =org.wikipedia.en Wikipedia (English) 

      =com.google.ugc.c752d13e87c4fbd7 Webcams (from Webcams.travel) 

     =transit Transit 

      =bike Bike Routes 

  e.g. lci=com.panoramio.all,org.wikipedia.en for Photos and Wikipedia English. 

&view= (view=text???  view=map????).

-- Directions --

&saddr= (출발지). 

&daddr= (목적지)

&mra ?? what does mean this route parameter? known possible values=dm, dpe, cc, ls, ... 

&mrcr ?? what does mean this route parameter? known possible values=0 

&mrsp (

          =0 Switches on resolving street names from coordinates.

          =1 Switches off resolving street names from coordinates.

&mrad= (목적지 추가). 

          If you've got three points in your trip you can use saddr=, daddr= and mrad= instead of "+to:" clauses.

&dirflg (경로). 

         =h Switches on "Avoid Highways" route finding mode. 

         =t Switches on "Avoid Tolls" route finding mode. 

         =r Switches on "Public Transit" - only works in some areas. 

         =w Switches to walking directions - still in beta. 

         =b Switches to biking directions - only works in some areas and still in beta.

&via= Comma separated list of intermediate addresses for directions, that should be 'via points'. In the example via=1,3addresses 1 and 3 will be via points without their own entry in the sidebar. The start (0), the 2nd intermediate (2) and the end (4) will be full addresses.

&doflg= Distance Units. (Defaults to preval‍ent units in country of origin.) 

          =ks ??

          =ptk Outputs directions in metric (km). 

          =ptm Outputs directions in imperial (miles). 


--  Street View --

&cbll= Latitude,longitude for Street View. 

&cbp= Street View window that accepts 5 parameters:

Street View/map arrangement, 11=upper half Street View and lower half map, 12=mostly Street View with corner map

Rotation angle/bearing (in degrees)

Tilt angle, -90 (straight up) to 90 (straight down)

Zoom level, 0-2

Pitch (in degrees) -90 (straight up) to 90 (straight down), default 5

&panoid= Panorama ID. The ID of the current nearby panorama object. Panorama objects ids are used in the little arrows you can click on in Street View to move you to the next object/property. Eg panoid=eTnPNGoy4bxR9LpjjfFuOw 


-- Output Control  --

&hl= (??)

&om= (오른쪽 아래 오버뷰맵). 

&ie= (입력 인코딩) e.g. ie=UTF8

&oe= (출력 인코딩) e.g. oe=UTF8. 

&output= 출력 포멧

&output=html

&output=js Outputs xxJavaScript object literals and function calls used by Google Maps, including encoded polyline data for driving directions, and stage information in HTML format. 

&output=kml ( 검색결과 10를 kml화일로 저장. )

&output=mobile(맵, 이미지 등 생략).  

&output=nl Outputs a small KML file containing a NetworkLink wrapper linking to a URL from which Google Earth and Google Maps can obtain the information (only known to work with MyMaps). 

&output=embed Outputs HTML suitable for embedding in third party sites, only works with the presence of the encrypted s= param, presumably to stop arbitrary content being included. 

&output=dragdir returns a JSON object that contains the reverse geocode and a an encoded polyline for a given saddr (start point of the route) and daddr (endpoint of the route) 

&output=georss (Geo)RSS output for the current map - probably only MyMaps 

&f= Controls the style of query form to be displayed. 

&f=d Displays the "directions" form (two input boxes: from, to). 

&f=l Displays the "local" form (two input boxes: what, where). 

&f=q (or no parameter) The default search form is displayed (single input). 

&pw= Activates print mode and initiates printing. There seems to be a problem at the moment with pw=1, but using settings like pw=2 is OK. 

&v= When output=kml is selected specifies the kml version. Defaults to 2.0. Version 2.2 can be specified: v=2.2.


출처 : http://cluster1.cafe.daum.net/_c21_/bbs_search_read?grpid=1KoKA&fldid=hMei&datanum=43&contentval=&docid=1KoKAhMei4320101021162518


첨부파일 : 

map.htm


출처 : http://zero-gravity.tistory.com/154


   ↓ <head>와 </head>사이에 넣는다.

<script type="text/javascript" src="http://maps.googleapis.com/maps/api/js?sensor=false"></script>

1
2
3
4
5
6
7
8
9
10
11
12
13
14
15
16
17
18
19
20
21
22
23
24
25
26
27
28
29
30
31
32
33
34
35
36
37
38
39
40
41
42
43
44
45
46
47
<!-- GoogoleMap Asynchronously Loading the API ********************************************* -->
<script type="text/javascript">


      function initialize() {
        var mapLocation = new google.maps.LatLng('36.322473', '127.412501'); // 지도에서 가운데로 위치할 위도와 경도
        var markLocation = new google.maps.LatLng('36.322473', '127.412501'); // 마커가 위치할 위도와 경도
         
        var mapOptions = {
          center: mapLocation, // 지도에서 가운데로 위치할 위도와 경도(변수)
          zoom: 18, // 지도 zoom단계
          mapTypeId: google.maps.MapTypeId.ROADMAP
        };
        var map = new google.maps.Map(document.getElementById("map-canvas"), // id: map-canvas, body에 있는 div태그의 id와 같아야 함
            mapOptions);
         
        var size_x = 60; // 마커로 사용할 이미지의 가로 크기
        var size_y = 60; // 마커로 사용할 이미지의 세로 크기
         
        // 마커로 사용할 이미지 주소
        var image = new google.maps.MarkerImage( 'http://www.larva.re.kr/home/img/boximage3.png',
                            new google.maps.Size(size_x, size_y),
                            '',
                            '',
                            new google.maps.Size(size_x, size_y));
         
        var marker;
        marker = new google.maps.Marker({
               position: markLocation, // 마커가 위치할 위도와 경도(변수)
               map: map,
               icon: image, // 마커로 사용할 이미지(변수)
//             info: '말풍선 안에 들어갈 내용',
               title: '서대전네거리역이지롱~' // 마커에 마우스 포인트를 갖다댔을 때 뜨는 타이틀
        });
         
        var content = "이곳은 서대전네거리역이다! <br/> 지하철 타러 가자~"; // 말풍선 안에 들어갈 내용
         
        // 마커를 클릭했을 때의 이벤트. 말풍선 뿅~
        var infowindow = new google.maps.InfoWindow({ content: content});
 
        google.maps.event.addListener(marker, "click", function() {
            infowindow.open(map,marker);
        });


      }
      google.maps.event.addDomListener(window, 'load', initialize);
</script>


//위치 검색하기


  위치를 검색할 때, 위도와 경도로 찾게 되면 항상 미국 구글맵에 들어가서 위치를 검색한 다음에 위도와 경도를 알아내서 직접 기입해야 하는 수밖에 없는데... 이번 글에서는 그런 불편을 없애기 위해 위도/경도가 아닌 주소로 바로 검색하는 방법을 사용하려 한다.


   이 방법을 찾게 된 이유는 DB에 있는 수 십개의 업체들을 웹상에 지도로 표시해야 하는데 위도/경도 컬럼을 만들어서 일일히 업데이트 하는 게 지옥이었기 때문이다. 그래서 주소 컬럼을 이용해서 업체의 주소를 가져와 바로 검색할 수 있는 방법을 찾게 됐다. 구글맵API에서는 이걸 지오코딩이라고 부른다.


   전에도 말했지만 방법은 어렵지 않다.


※ 참고한 곳 

https://developers.google.com/maps/documentation/javascript/geocoding?hl=ko

https://developers.google.com/maps/documentation/javascript/examples/geocoding-simple?hl=ko


   참고했던 사이트를 보면, 구글에서는 주소 검색을 사용자가 직접 입력해 검색하는 방식으로 예제를 보여주는데, 아래 내가 한 방식은 미리 주소를 코딩해놓는 방식이다.


먼저 html doctype을 <!DOCTYPE html>로 변경해준 다음,

head 부분에

<script type="text/javascript" src="http://maps.googleapis.com/maps/api/js?sensor=true"></script>

추가해준다.


그리고..

↓ head에 삽입

1
2
3
4
5
6
7
8
9
10
11
12
13
14
15
16
17
18
19
20
21
22
23
24
25
26
27
28
29
30
31
32
33
34
35
36
37
38
39
40
41
42
43
44
45
46
47
48
49
50
51
<!-- GoogoleMap Asynchronously Loading the API ********************************************* -->
<script type="text/javascript">
    function initialize() {
     
        var mapOptions = {
                            zoom: 18, // 지도를 띄웠을 때의 줌 크기
                            mapTypeId: google.maps.MapTypeId.ROADMAP
                        };
         
         
        var map = new google.maps.Map(document.getElementById("map-canvas"), // div의 id과 값이 같아야 함. "map-canvas"
                                    mapOptions);
         
        var size_x = 40; // 마커로 사용할 이미지의 가로 크기
        var size_y = 40; // 마커로 사용할 이미지의 세로 크기
     
        // 마커로 사용할 이미지 주소
        var image = new google.maps.MarkerImage( '주소 여기에 기입!',
                                                    new google.maps.Size(size_x, size_y),
                                                    '',
                                                    '',
                                                    new google.maps.Size(size_x, size_y));
         
        // Geocoding *****************************************************
        var address = '대전광역시 중구 한밭도서관길 222'; // DB에서 주소 가져와서 검색하거나 왼쪽과 같이 주소를 바로 코딩.
        var marker = null;
        var geocoder = new google.maps.Geocoder();
        geocoder.geocode( { 'address': address}, function(results, status) {
            if (status == google.maps.GeocoderStatus.OK) {
                map.setCenter(results[0].geometry.location);
                marker = new google.maps.Marker({
                                map: map,
                                icon: image, // 마커로 사용할 이미지(변수)
                                title: '한밭도서관', // 마커에 마우스 포인트를 갖다댔을 때 뜨는 타이틀
                                position: results[0].geometry.location
                            });
 
                var content = "한밭도서관<br/><br/>Tel: 042-580-4114"; // 말풍선 안에 들어갈 내용
             
                // 마커를 클릭했을 때의 이벤트. 말풍선 뿅~
                var infowindow = new google.maps.InfoWindow({ content: content});
                google.maps.event.addListener(marker, "click", function() {infowindow.open(map,marker);});
            } else {
                alert("Geocode was not successful for the following reason: " + status);
            }
        });
        // Geocoding // *****************************************************
         
    }
    google.maps.event.addDomListener(window, 'load', initialize);
</script>


↓body 안에 삽입

1
<div id="map-canvas" style="width: 100%; height: 340px" title="도서관 위치입니다."></div>


끝~!


출처 : http://blog.naver.com/jiho3400?Redirect=Log&logNo=10174180497


오늘은 구글 지도에 관해서 간단히 정리해 봤습니다.

google map v3 로 바뀌고 부터는 키 정보 필요없이 구글 지도 정보를 사용하는게 가능해졌는데요..

빙맵이나 다른 경쟁사와 비교해봐도 컨텐츠를 비롯해서 사용방법, 정보의 규모면등등 현존 쵝오 인듯 하네요...^^


그럼 구글 맵 간단히 시작하는 방법을 알아보겠습니다.


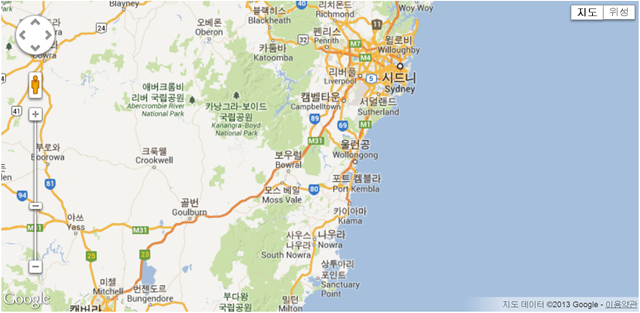
위의 이미지와 같은 지도를 만들어 보겠습니다.

먼저 google api 를 참조해서 넣어야겠죠. 단 당연한 말이겠지만 인터넷이 사용가능한 환경에서만 개발이 가능합니다..^^

먼저 head테그 내에 아래의 자바스크립트를 삽입합니다.

   1: <script src="https://maps.googleapis.com/maps/api/js?v=3.exp&sensor=false"></script>

이걸 삽입하면 이제 구글 지도 개발을 커스터마이징 하는게 가능합니다.

그럼 다음으로 자바스크립트를 적어보겠습니다.

   1: <script>
   2: var map;
   3: function initialize() {
   4:   var mapOptions = {
   5:     // 줌을 적용
   6:     zoom: 8,
   7:     // 지도의 중심지점을 설정
   8:     center: new google.maps.LatLng(-34.397, 150.644),
   9:     // 지도의 타입 설정
  10:     mapTypeId: google.maps.MapTypeId.ROADMAP
  11:   };
  12:   map = new google.maps.Map(document.getElementById('map-canvas'),
  13:       mapOptions);
  14: }
  15:  
  16: google.maps.event.addDomListener(window, 'load', initialize);
  17:  
  18:     </script>

이 자바스크립트를 위의 api바로 밑에 삽입합니다.


그리고 html에 타겟영역을 만들어주면 끝입니다.


   1: <div style="width:600px; height:400px;" id="map-canvas"></div>

지도를 삽입하고 싶은 html영역에 위 코드를 넣으면 끝입니다.

일단 크기는 600 * 400으로 넣었습니다만 원하시는 크기로 바꾸면 지도의 크기가 결정됩니다.


어때요? 참 쉽죠^^


그럼 시간날때 조금더 응용법을 올려보도록 하겠습니다.

아래는 여기까지의 완성된 소스 입니다.

   1: <!DOCTYPE html>
   2: <html>
   3:   <head>
   4:     <title>Simple Map</title>
   5:     <meta name="viewport" content="initial-scale=1.0, user-scalable=no">
   6:     <meta charset="utf-8">
   7:     <style>
   8:       html, body, #map-canvas {
   9:         margin: 0;
  10:         padding: 0;
  11:         height: 100%;
  12:       }
  13:     </style>
  14:     <script src="https://maps.googleapis.com/maps/api/js?v=3.exp&sensor=false"></script><pre style="border-top-style: none; overflow: visible; font-size: 8pt; border-left-style: none; font-family: 'Courier New', courier, monospace; border-bottom-style: none; color: black; padding-bottom: 0px; direction: ltr; text-align: left; padding-top: 0px; border-right-style: none; padding-left: 0px; margin: 0em; line-height: 12pt; padding-right: 0px; width: 100%; background-color: white">   1:  </pre><pre style="border-top-style: none; overflow: visible; font-size: 8pt; border-left-style: none; font-family: 'Courier New', courier, monospace; border-bottom-style: none; color: black; padding-bottom: 0px; direction: ltr; text-align: left; padding-top: 0px; border-right-style: none; padding-left: 0px; margin: 0em; line-height: 12pt; padding-right: 0px; width: 100%; background-color: #f4f4f4">   2:     <script></pre><pre style="border-top-style: none; overflow: visible; font-size: 8pt; border-left-style: none; font-family: 'Courier New', courier, monospace; border-bottom-style: none; color: black; padding-bottom: 0px; direction: ltr; text-align: left; padding-top: 0px; border-right-style: none; padding-left: 0px; margin: 0em; line-height: 12pt; padding-right: 0px; width: 100%; background-color: white">   3: var map;</pre><pre style="border-top-style: none; overflow: visible; font-size: 8pt; border-left-style: none; font-family: 'Courier New', courier, monospace; border-bottom-style: none; color: black; padding-bottom: 0px; direction: ltr; text-align: left; padding-top: 0px; border-right-style: none; padding-left: 0px; margin: 0em; line-height: 12pt; padding-right: 0px; width: 100%; background-color: #f4f4f4">   4: function initialize() {</pre><pre style="border-top-style: none; overflow: visible; font-size: 8pt; border-left-style: none; font-family: 'Courier New', courier, monospace; border-bottom-style: none; color: black; padding-bottom: 0px; direction: ltr; text-align: left; padding-top: 0px; border-right-style: none; padding-left: 0px; margin: 0em; line-height: 12pt; padding-right: 0px; width: 100%; background-color: white">   5:   var mapOptions = {</pre><pre style="border-top-style: none; overflow: visible; font-size: 8pt; border-left-style: none; font-family: 'Courier New', courier, monospace; border-bottom-style: none; color: black; padding-bottom: 0px; direction: ltr; text-align: left; padding-top: 0px; border-right-style: none; padding-left: 0px; margin: 0em; line-height: 12pt; padding-right: 0px; width: 100%; background-color: #f4f4f4">   6:     zoom: 8,</pre><pre style="border-top-style: none; overflow: visible; font-size: 8pt; border-left-style: none; font-family: 'Courier New', courier, monospace; border-bottom-style: none; color: black; padding-bottom: 0px; direction: ltr; text-align: left; padding-top: 0px; border-right-style: none; padding-left: 0px; margin: 0em; line-height: 12pt; padding-right: 0px; width: 100%; background-color: white">   7:     center: new google.maps.LatLng(-34.397, 150.644),</pre><pre style="border-top-style: none; overflow: visible; font-size: 8pt; border-left-style: none; font-family: 'Courier New', courier, monospace; border-bottom-style: none; color: black; padding-bottom: 0px; direction: ltr; text-align: left; padding-top: 0px; border-right-style: none; padding-left: 0px; margin: 0em; line-height: 12pt; padding-right: 0px; width: 100%; background-color: #f4f4f4">   8:     mapTypeId: google.maps.MapTypeId.ROADMAP</pre><pre style="border-top-style: none; overflow: visible; font-size: 8pt; border-left-style: none; font-family: 'Courier New', courier, monospace; border-bottom-style: none; color: black; padding-bottom: 0px; direction: ltr; text-align: left; padding-top: 0px; border-right-style: none; padding-left: 0px; margin: 0em; line-height: 12pt; padding-right: 0px; width: 100%; background-color: white">   9:   };</pre><pre style="border-top-style: none; overflow: visible; font-size: 8pt; border-left-style: none; font-family: 'Courier New', courier, monospace; border-bottom-style: none; color: black; padding-bottom: 0px; direction: ltr; text-align: left; padding-top: 0px; border-right-style: none; padding-left: 0px; margin: 0em; line-height: 12pt; padding-right: 0px; width: 100%; background-color: #f4f4f4">  10:   map = new google.maps.Map(document.getElementById('map-canvas'),</pre><pre style="border-top-style: none; overflow: visible; font-size: 8pt; border-left-style: none; font-family: 'Courier New', courier, monospace; border-bottom-style: none; color: black; padding-bottom: 0px; direction: ltr; text-align: left; padding-top: 0px; border-right-style: none; padding-left: 0px; margin: 0em; line-height: 12pt; padding-right: 0px; width: 100%; background-color: white">  11:       mapOptions);</pre><pre style="border-top-style: none; overflow: visible; font-size: 8pt; border-left-style: none; font-family: 'Courier New', courier, monospace; border-bottom-style: none; color: black; padding-bottom: 0px; direction: ltr; text-align: left; padding-top: 0px; border-right-style: none; padding-left: 0px; margin: 0em; line-height: 12pt; padding-right: 0px; width: 100%; background-color: #f4f4f4">  12: }</pre><pre style="border-top-style: none; overflow: visible; font-size: 8pt; border-left-style: none; font-family: 'Courier New', courier, monospace; border-bottom-style: none; color: black; padding-bottom: 0px; direction: ltr; text-align: left; padding-top: 0px; border-right-style: none; padding-left: 0px; margin: 0em; line-height: 12pt; padding-right: 0px; width: 100%; background-color: white">  13:  </pre><pre style="border-top-style: none; overflow: visible; font-size: 8pt; border-left-style: none; font-family: 'Courier New', courier, monospace; border-bottom-style: none; color: black; padding-bottom: 0px; direction: ltr; text-align: left; padding-top: 0px; border-right-style: none; padding-left: 0px; margin: 0em; line-height: 12pt; padding-right: 0px; width: 100%; background-color: #f4f4f4">  14: google.maps.event.addDomListener(window, 'load', initialize);</pre><pre style="border-top-style: none; overflow: visible; font-size: 8pt; border-left-style: none; font-family: 'Courier New', courier, monospace; border-bottom-style: none; color: black; padding-bottom: 0px; direction: ltr; text-align: left; padding-top: 0px; border-right-style: none; padding-left: 0px; margin: 0em; line-height: 12pt; padding-right: 0px; width: 100%; background-color: white">  15:  </pre><pre style="border-top-style: none; overflow: visible; font-size: 8pt; border-left-style: none; font-family: 'Courier New', courier, monospace; border-bottom-style: none; color: black; padding-bottom: 0px; direction: ltr; text-align: left; padding-top: 0px; border-right-style: none; padding-left: 0px; margin: 0em; line-height: 12pt; padding-right: 0px; width: 100%; background-color: #f4f4f4">  16:     </pre></script>
  15:   </head>
  16:   <body>
  17:     <div style="width:600px; height:400px;" id="map-canvas"></div>
  18:   </body>
  19: </html>


<script type="text/javascript">

   function zoomInOut(flag){

var img = document.getElementById("popupImg"); //사이즈 변경할 이미지 객체

var currentWidth = img.width;

var currentHeight= img.height;

var newWidth=0;

var newHeight=0;

if(flag=="in"){

newWidth=parseInt(currentWidth*1.3);

newHeight=parseInt(currentHeight*1.3);

}else if(flag="out"){

newWidth=parseInt(currentWidth*0.7);

newHeight=parseInt(currentHeight*0.7);

}

img.width=newWidth; //변경 할 사이즈 적용

img.height=newHeight; //변경 할 사이즈 적용

window.resizeTo(newWidth+40, newHeight+40); //해당팝업창 사이즈 재조정

}

</script>


해당팝업 사이즈 재종하는 부분도 값을 받아서 하고 싶었으나

현재 팝업 사이즈를 가져오는 방법이 잘못된건지 가져와지지 않아서

이미지사이즈 보다 더해준 값 만큼만 더 크게 설정함.


현재 팝업창 사이즈 가져오는 코드는 댓글 좀 부탁드리겠습니다.

자바스크립트 

           <script>                    
                        function pop_scroll()
                        {               
                            interval = setInterval("pop_view()", 10000);                      
                        }
                        
                        function pop_view(){                         
                                var id = "";                           
                                for(j = 1; j <3; j++){
                                    id = "divName_"+ j;                             
                                     disp = document.getElementById(id).style.display;    
                                              
                                     if(disp == "block"){
                                          if(j == 1 ) {
                                              document.getElementById("divName_1").style.display = "none";
                                              document.getElementById("divName_2").style.display = "block";
                                              
                                              break;
                                          }                                       
                                           if(j == 2 ) {
                                              document.getElementById("divName_1").style.display = "block";
                                              document.getElementById("divName_2").style.display = "none";
                                              
                                              break;
                                          }


                                     }
                                }           
             }
             
              pop_scroll();
                        
       </script>


div적용

 <div id="divName_1" style="display:block" >첫번째 보여질 DIV </div>

 <div id="divName_2" style="display:none" >두번째 보여질 DIV </div>   
   

출처 무시해도 될 만큼 사소한 건 없다。 | 그루밍
원문 http://eyesi.me/110097754772

location.reload()                                             // 현재 페이지 새로고침

top.document.(프레임이름).location.reload();      // 프레임 새로고침

top.document.location.reload();                        // 프레임 전체 새로고침

opener.location.reload();                                 // 부모창 새로고침

setTimeout("history.go(0);", 10);                       // 자동 새로고침


출처 : http://blog.naver.com/wjh13579?Redirect=Log&logNo=80155561216

// 주민등록상 생일을 현재 날짜와 비교하여 나이계산 (만)

// 8403211 일 경우 29세, 주민등록상 생일 지났으므로 28세 출력하도록

var jumin1 = document.getElementById("ssn1").value; //주민등록번호 앞

var jumin2 = document.getElementById("ssn2").value; //주민등록번호 뒤

var curDateObj = new Date(); // 날짜 Object 생성

var curDate = ""; // 현재일자

var tmpAge = 0; // 임시나이

var curYear = curDateObj.getYear(); // 현재년도

var curMonth = curDateObj.getMonth() + 1; // 현재월

if(curMonth < 10) curMonth = "0" + curMonth; // 현재 월이 10보다 작을경우 '0' 문자 합한다

var curDay = curDateObj.getDate(); // 현재일

if(curDay < 10) curDay = "0" + curDay; // 현재 일이 10보다 작을경우 '0' 문자 합한다

curDate = curYear + curMonth + curDay;

var genType = jumin2.substring(0, 1); // 주민번호 뒷자리 성별구분 문자 추출

if(genType <= 2) {

tmpAge = curYear - (1900 + parseInt(jumin1.substring(0, 2))); // 1, 2 일경우

} else {

tmpAge = curYear - (2000 + parseInt(jumin1.substring(0, 2))); // 그 외의 경우

}

var tmpBirthday = jumin1.substring(2, 6); // 주민번호 4자리 생일문자 추출

if(curDate < (curYear + tmpBirthday)) {

tmpAge += 1;

}

//alert(tmpAge); // 2012년 4월 13일 일 경우 2012413 반환

if(tmpAge > 23){

alert("만 24세이상은 예약 하실 수 없습니다.");

return false;

}


출처 : http://serve4u.co.kr/80188641887


$.noConflct();


$ 식별자를 쓰는 다른 프레임 워크간의 충돌을 방지 하기 위해서

제이쿼리에서 $를쓰지 못하게 하는 메서드


$.noConflict();


사용후에는 기본에 $로 쓰던 부분들을 jQuery로 바꾸어서 써줘야 한다

ex) jQuery(document).ready(function(){});


jQuery쓰는 것이 불편하면 변수에 대입하여 사용

var j=jQuery;

j(document).ready(function(){});


- 모던웹을 위한 자바스크립트 & 제이쿼리 책에 대해 공부중 (p 366)

escape(), encodeURI(), encodeURIComponent() 차이

비슷하면서도 다른 함수들 입니다.
세가지 함수 모두 ASCII문자로 바꿔주는데, 그럼 각각의 차이점을 알아 보겠습니다.

1. escape() : unescape()

ABCDEFGHIJKLMNOPQRSTUVWXYZ abcdefghijklmnopqrstuvwxyz 1234567890 @*-_+./

위에서 열거된 문자가 아니면 모두 변환을 합니다. 1바이트문자는 %XX 형태로 2바이트 문자는 %uXXXX 식으로 변환합니다.

2. encodeURI() : decodeURI()
escape()와 같이 변환을 하지만, 인터넷 주소에서 쓰는 특수 문자 : ; / = ? & 는 변환을 하지 않습니다.

3. encodeURIComponent() : decodeURIComponent()
인터넷 주소에서 쓰는 특수 문자 : ; / = ? & 까지 변환을 합니다. 인터넷 주소를 하나의 변수에 넣을때 쓸 수 있습니다.

★ 덧붙임 : encodeURIComponent() 는 UTF-8 로 인코딩 하는 것과 같음

예제)

1<script type="text/javascript">
2var url = "http://yesyo.com/?retrun=고고";
3document.write('<p><b>URL :</b> ' + url + '</p>');
4document.write('<p><b>escape() :</b> ' + escape(url) + '</p>');
5document.write('<p><b>encodeURI() :</b> ' + encodeURI(url) + '</p>');
6document.write('<p><b>encodeURIComponent() :</b> ' + encodeURIComponent(url) + '</p>');
7</script>

결과 :
URL : http://yesyo.com/?retrun=고고
escape() : http%3A//yesyo.com/%3Fretrun%3D%uACE0%uACE0
encodeURI() : http://yesyo.com/?retrun=%EA%B3%A0%EA%B3%A0
encodeURIComponent() : http%3A%2F%2Fyesyo.com%2F%3Fretrun%3D%EA%B3%A0%EA%B3%A0


출처 : http://yesyo.com/mintbbs/bbs/board.php?bo_table=javascript&wr_id=163&sfl=&stx=&sst=wr_datetime&sod=desc&sop=and&page=1

추가 사항 1.

URL을 통째로 인코딩할 때는 encodeURI(),

URL의 파라메터만 인코딩할 때는 encodeURIComponent()를 쓰면 된다.

escape()/unescape()는 잊어버려라.

추가 사항 2.

자바의 java.net.URLEncoder는 어떨까?

결론은 이녀석은 자바스크립트의 encodeURI()와 동일하다.

주의할 점은 java.net.URLEncoder의 두개의 함수 중의 파라메터가 두개인 녀석(캐릭터 인코딩을 지정해주는)을, 두번째 파라메터를 "UTF-8"로 지정해서 사용해야 한다.

추가 사항 3.

적용 예) CharSet="UTF-8" 인 JSP에서 AJAX(XMLHttpRequest)로 한글 파라미터 전송시,

JSP : &param=encodeURI(encodeURIComponent("한글")); 와 같이 한글 파라미터 처리.

JAVA : URLDecoder.decode(request.getParameter("param"), "UTF-8"); 와 같이 디코딩 처리.

참고 :

http://d.hatena.ne.jp/kskyuny/20090304/1236145944

http://blog.naver.com/akrsg/140118242329

그리고 내 경험!

고생하시는 개발자 분들 도움 되시길~


[출처] http://mtkwn.blog.me/40112707174


Insert title here


//name 속성으로 가져오기 힘들거나 어려울때 id값으로 가져오는 방법으로 //id는 유일무이 해야 가능하다.

+ Recent posts